
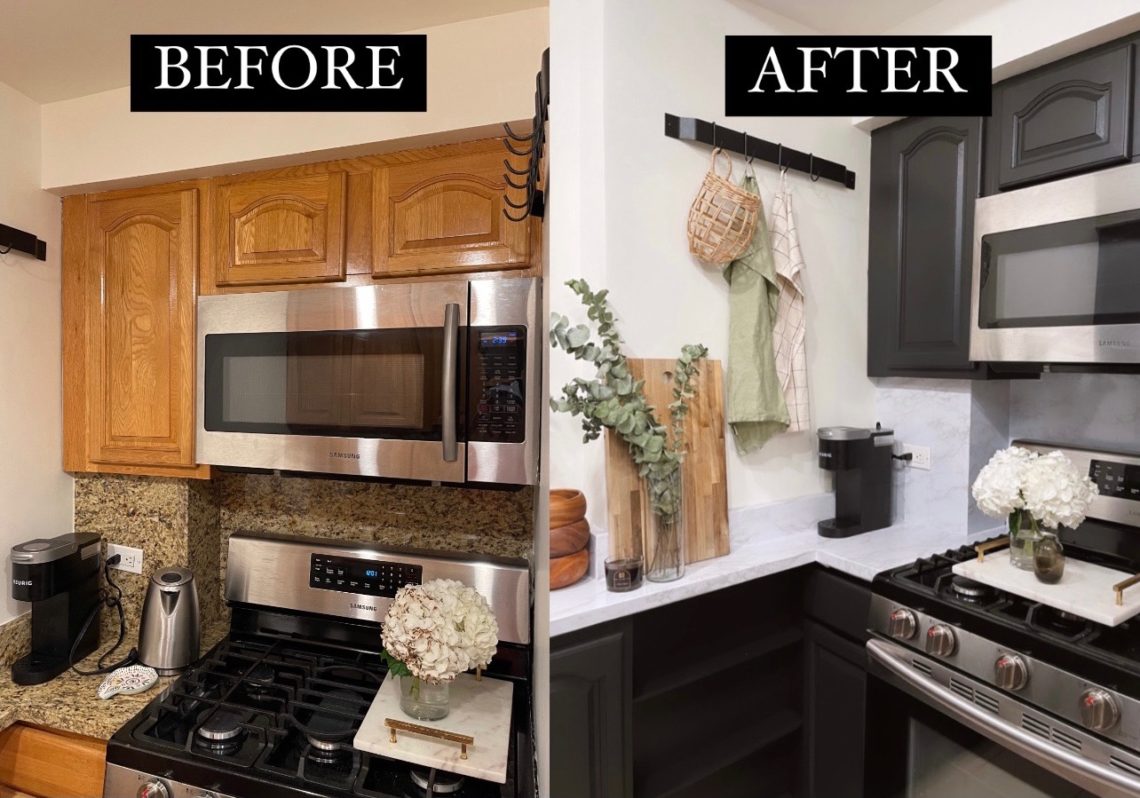
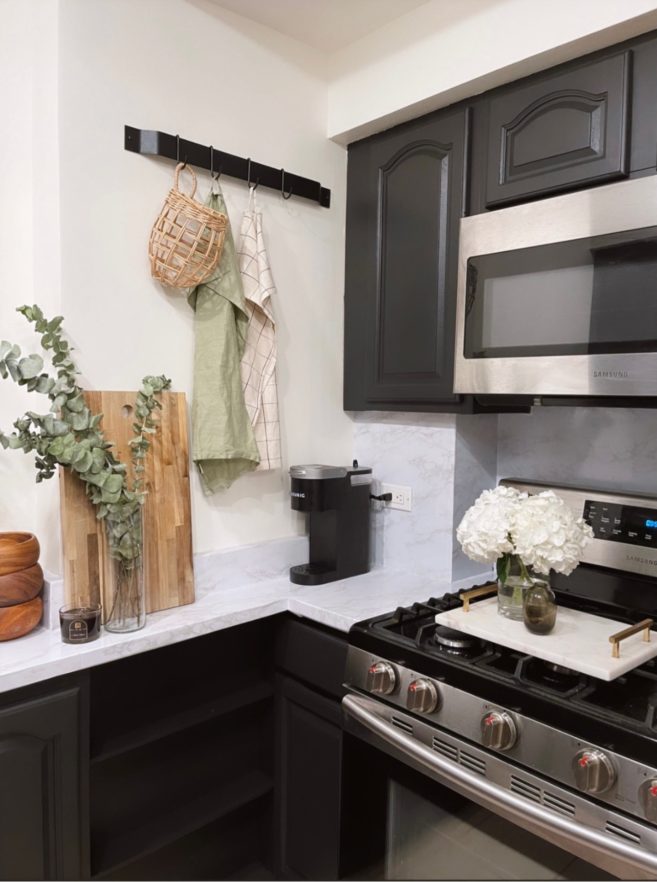
PAINTING KITCHEN CABINETS
WHAT DO I NEED:

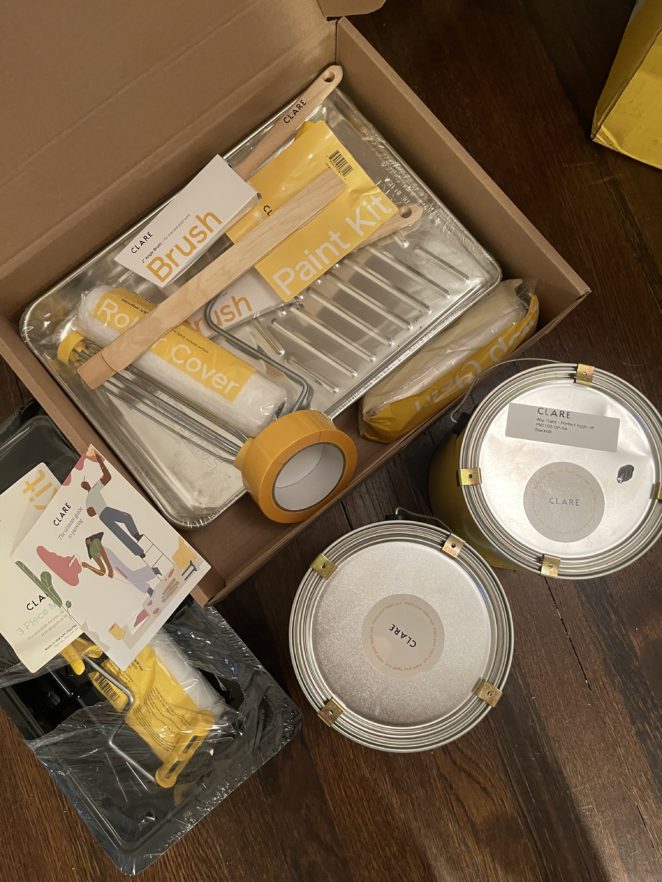
- Paint: We used the color “Blackish” from Clare Paint (also where we got the rest of the supplies)
- Roller (2 sizes and 2 different ones for Primer and for Paint) (the MVP was the Mini Roller that really helped with the cabinet fronts, wish I would’ve gotten another one of those!)
- Painting Brushes (one larger one and one tiny for touch ups and sides)
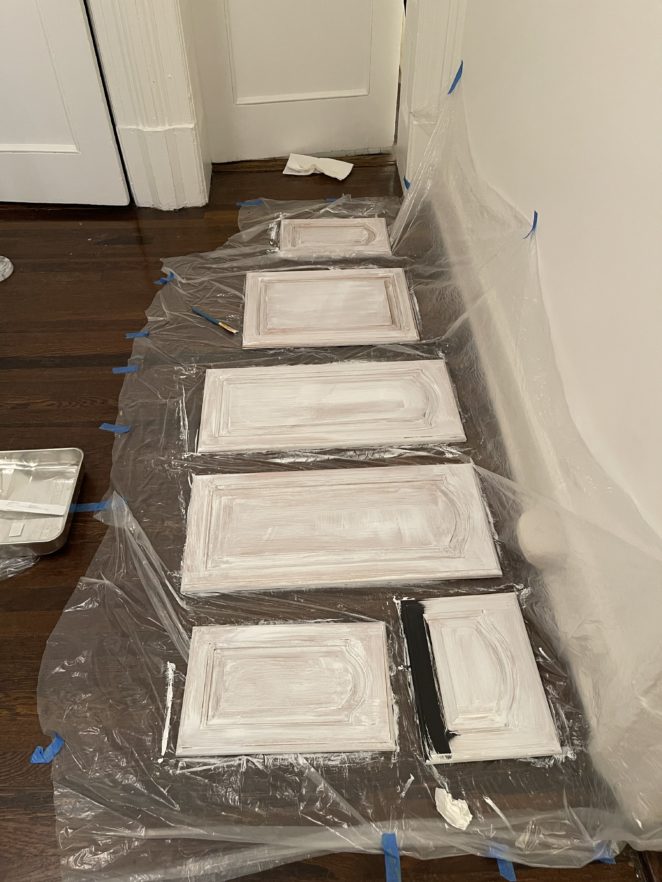
- Painting Sheets (to lay down the fronts of the cabinets)
- Painters Tape
- Good Playlist: the one we listened to linked here!
WHAT DO I DO:
- Prep the Room (lay out where you’ll be putting the fronts of the cabinets and clean the area)
- Remove all fronts (keep the screws in organized labeled bags to make putting them back together much easier)
- Clean the cabinet fronts and the kitchen really well
- Sand
- Prime (and then wait for Prime to dry before you…)
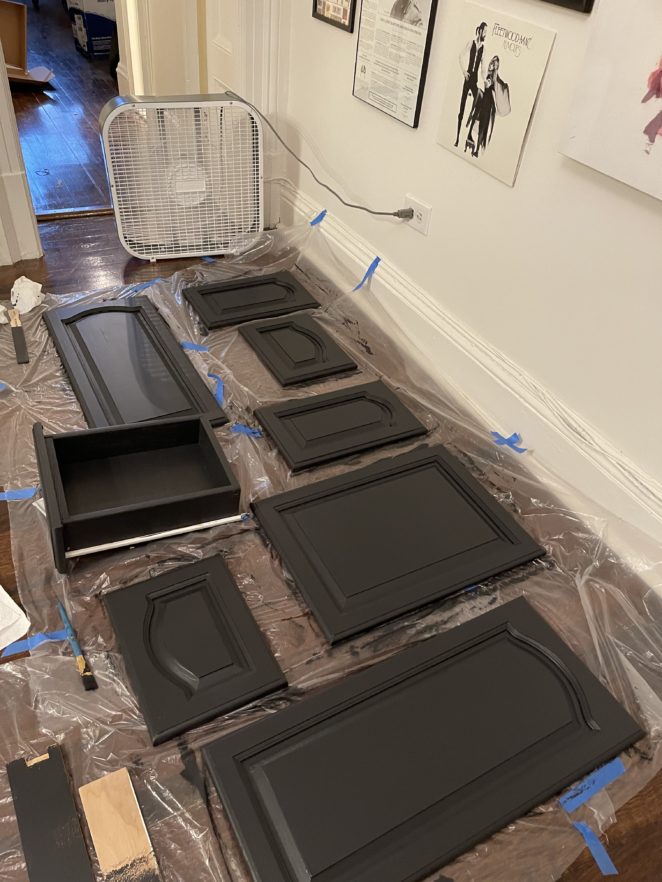
- Paint ! (The most exciting part really. I wish we had paint cans to prop up all of the cabinet fronts, but the order we painted the cabinets when as follows: Prime Front (dry), Prime Back (dry), Paint front (dry), Paint back (dry). We also went in with a second coat!)
- Wait a night. Our paint dried really quickly, another reason why I loved Clare paint – no smell and dried so fast. But we waited the night for the paint to really dry before moving them back to the kitchen
- Screw Cabinets back on
- Touch Ups! One follower gave me the tip to hold a little extra paint and a small brush on the side of the next week for each day you would see a new spot missing and they were so right!
WOOT WOOT! I am so proud of you.


")
 #lol")

2 Comments
Malinda Butler
September 14, 2025 at 11:56 amWhat is the finish on the black cabinets
Savvy Shields
September 23, 2025 at 6:41 pmIts a matte finish in the color “Blackish” from Clare paint!